Category: DIY

  • What kind of skincare products can I DIY?
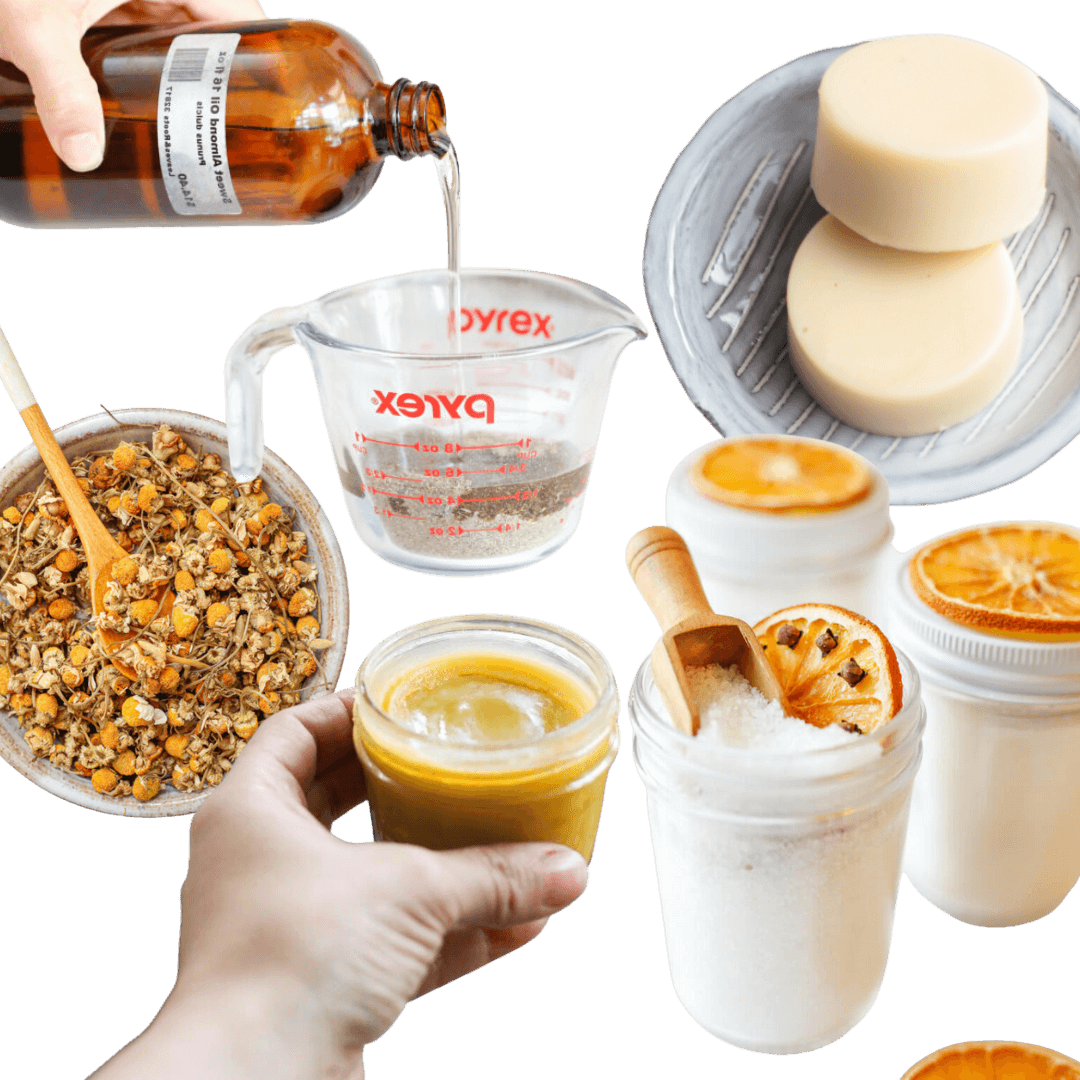
    What kind of skincare products can I DIY?

    What kind of skincare products can I DIY?

    Want to make your own all-natural skincare from home?

    Below, I’m going to give you a list of “anhydrous” skincare products that are perfect for DIY.

    My intention for sharing this, is so that you can feel confident in making your own skincare at home!

    What kind of products can you make at home?

    The short answer is that you can learn how to make any kind of skincare that you want to use. It comes down to what you’re interested in.

    What I make and teach is a niche category of skincare called “anhydrous” which means water-less.

    Anhydrous products only contain dry ingredients: dried herbs, dehydrated fruits and vegetables, grains, oils, essential oils, butters, and waxes…

    And they’re perfect for DIY, because they’re effective, simple to make, and long-lasting.

    Here’s why:

    Most skincare products contain water, it’s usually a main ingredient. And there’s nothing wrong with that.

    But, whenever you make a recipe that has water – it will also need to include specialized cosmetic ingredients to stabilize the product: thickeners to improve the feel, solubilizers to avoid separation… and, because water supports life – we’d also need to add preservatives, to prevent growing bacteria, yeasts and mold that could damage the skin. 

    For me personally, I’m not interested in using preservatives and synthetic ingredients. My interest is in making skincare with all natural ingredients.

    It’s not a moral choice. I don’t believe that all synthetic ingredients are bad. It’s a personal choice. I love working with natural ingredients… and my skin responds better to it.

    If you want to make all-natural skincare at home without preservatives and synthetic ingredients – it’s best to leave out the water – and make anhydrous products.

    checked-checkbox That way you can make skincare, without worrying about it going off.

    checked-checkbox You don’t have to purchase a bunch of specialty cosmetic ingredients.

    checked-checkbox And you can use what’s around you – ingredients from your kitchen, supermarket and home garden.

    checked-checkbox Plus, anhydrous skincare is really potent. It has a high concentration of active ingredients because it hasn’t been diluted down with water.

    The shelf life for anhydrous products is 3 months!

    • The shelf life is actually much longer, anywhere from six months to one year.
    • I prefer to play it safe, and will make just enough to last 3 months, that way I know it’s safe, fresh and super potent.
    • Anhydrous products do not need to be refrigerated. Keep in air-tight container, away from water and moisture.

    Here’s a list of anhydrous products that you can make with all-natural ingredients, using self-preservation methods and simple kitchen techniques.

    1. Cleansers

    These anhydrous cleansers are soap-free alternatives. They use ingredients that function as cleansers, in different ways: through exfoliation, absorbing excess oils, antimicrobial and cleansing properties. 

    • Oil Cleanser: A heavier, slow-absorbing oil that can be massaged onto the skin. Some oils have antimicrobial properties. The oil can be infused with herbs/essential oils with cleansing properties. Functions as a makeup remover.
    • Cleansing Balm: Solid form of a cleansing oil. Often combined with wax, and/or hard butters. Functions as a makeup remover.
    • Powdered Cleanser: Powdered grains and herbs with cleansing properties.
    • Exfoliant Cleanser: Powdered grains and herbs with exfoliating properties (physical, and/or chemical)

    NOTE: oil-based cleansers breaks down dirt, makeup, sunscreen and excess oils from the pores. It needs to be massaged onto dry skin, and then washed off with a soft cloth and water. 

    EXAMPLE: https://littlegreendot.com/regenerative-cleansing-oat-goat/


    2. Moisturizers

    A true moisturizer consists of both oil and water. Anhydrous products do not contain water – so we are missing ½ of the elements that the skin needs. When you use an anhydrous moisturizer, apply it over wet/damp skin to provide that water component.  

    • Face/body oil: An oil or blend of oils chosen for specific needs/functions.
    • Body Butter: Oil and solid fats, whipped together
    • Solid Moisturizer: Oil and wax to create a solid form.
    • Lip Balm: Lip balms serve as a protective occlusive. The product is designed to sit on top of the lips and protect the skin.

    EXAMPLE: https://littlegreendot.com/utama-spice-balm-recipe/


    3. Exfoliants

    There are two types of exfoliants: physical and chemical. Physical exfoliants physically scrub the skin. Chemical exfoliants resurface the skin by breaking up the  “glue” that holds dead skin cells together. 

    • Facial Scrub: Grains, herbs and/or botanicals with exfoliating properties that are specifically suited for the more delicate skin of the face
    • Body Scrub: Grains, herbs, botanicals, sugars and/or salt. For scrubbing the body.

    EXAMPLE: https://littlegreendot.com/the-simplest-remedy-to-scrub-stress-away/


    4. Masks

    Masks are specifically designed to sit on the skin for at least 15 mintues, to allow the ingredients to “do their work.” To use an anhydrous mask, you will need to “activate” it  with water,  and then apply onto the skin. 

    • Powdered mask: Loose powdered grains, and herbs, chosen for specific needs and benefits. 
    • Solid mask: Powdered grains, herbs, clay, milk powder… combined with oil and/or solid butters, to form a dough texture.

    EXAMPLE: https://littlegreendot.com/herbal-powder-face-mask-to-soothe-skin-mood/


    5. Bath & Body

    This category blurs the lines between skincare and self care. You can create therapeutic skincare to address your whole needs: skin, body and mind. For example, skincare to help soothe stress, promote rest, to soothe aches and to elevate your mood. 

    • Bath salts: Mineral rich salts for baths, and foot soaks. Combined with powdered herbs, and/or essential oils to treat all sorts of different skin, body, mind needs. 
    • Bath & shower bombs: Fizzy, aromatic products that create a fun, sensorial experience. Made with baking soda, citric acid, and therapeutic fragrances and essential oils to enhance the mood. 
    • Bath melt: Oil and hard butter, crafted into a solid form (like a chocolate bar) designed to melt in a warm bath and moisturize the skin. 
    • Perfume balm: Oil and wax, fragranced with therapeutic, aromatic essential oils and botanical extracts.
    • Aromatherapy mist: Includes water, but is made self-preserving by adding the appropriate amount of alcohol.

    EXAMPLE: https://littlegreendot.com/good-night-tinctured-bath-salts/


    happy making,
    Militza

  • When I saw the price tag I did a double take

    Natural homemade coffee scrub

    I’m in a trendy area in Singapore, window shopping, when I see this beautiful body scrub. My first instinct is to read the ingredients – it’s all natural, made with coffee and sea salt, coconut oil… mmmmm!

    And then I see the price. It costs $60…

    ouch!

    When I think back to what got me started into this wellness journey – it was out of pure frustration. I’d just learned that the trusted skincare brand I’d been using on my three-year-old daughter was full of weird and unnerving ingredients.

    I was upset at myself for not knowing sooner. I was nervous about making more mistakes.

    So, I hit the stores, determined to buy all-natural skin care. But the reality of how difficult that was soon hit me. I lived on a tight budget, in an already expensive city. Natural products were sold as a luxury, and even though I desperately wanted to use safe products for my family – I couldn’t afford them, not as an everyday option.

    It seemed completely unfair that we should have to choose between using toxic commercial products, or breaking the bank going natural. I was thinking, “How can that these be our only options?” Honestly, at that point – I wasn’t just frustrated, I was angry!

    They say that necessity is the mother of invention and it must be true.

    I took my frustration and poured it into learning. I spent years figuring out how to make natural living a reality for our family. Soon, the frustration turned into passion and a happy obsession. And I haven’t stopped since.

    For a long time, I only bought natural products as a treat. Today, I’m proud to say that natural beauty is not just reserved for special occasions. Everyday, I use the finest oils infused with nourishing herbs to moisturise our skin and hair. My children bathe in herbal baths… they smell of real flowers!

    It feels luxurious, but it’s completely accessible and I’m driven to show everyone how to do the same.

    I know so many parents who struggle to provide their families with safe skincare. I’ve heard people say over and over again that they’d love to use more natural products, but can’t afford them. And I get it, because I was there.

    I want you to know that the most empowering thing that I ever did was to not accept this as my reality – and to take action.

    Take matters into your own hands

    I’ve learned that making your own skin care is a real, practical and simple solution. Even though the idea of finding skincare in your kitchen or the produce aisle of the supermarket seems playful – don’t underestimate it! When you begin to learn the process, you’ll see you can create better skin care than most of what you find out there on the shelves.

    It changes everything.

    You’ll never again walk into a store and feel like you need to buy toxic skincare or struggle to afford natural  – because you know how to care for yourself.

    Stop skimping on the self-love!

    Have you noticed that when you buy an expensive natural skincare product, you’re precious with it. The bottle says to use two pumps, but you use one. Maybe skip days just to get the most out of it! We’ve all done that right?

    With your homemade product, you enjoy the same quality – but you’re lavish with yourself! You’re treating your full body, everyday. Every single inch of you deserves the best oils and nourishing ingredients. You walk out of your house with your head up, and when you start the day that way – watch out!

    Back to that $60 scrub. One day, standing there in your naturally glowing skin – you may very well discover a natural brand that you just fall in love with. Their process, the ingredients, their story. It’s happened to me, many times!

    If you choose to buy this product and bring it home – it’s not because it’s your only choice…it’s only because you WANT to.

    As a maker, you know the effort that goes into making whole-food skincare. You understand the ingredients and can immediately spot an authentic brand who love what they do. It’s beautiful to support these amazing makers who are aligned with your values.  You’re making an empowered choice – and that feels very different.

    So, if you’re struggling to bring natural beauty into your life – start by making one recipe!

    Check out this video (and don’t forget to subscribe to my channel) to see how to make your own beautiful body scrub – with my secret blend that creates a richness that I know you’ll love!


    When you try it, leave me a comment and tell me what you think. And if you need advice or want help getting started, email me, I read every message.

  • Learn // How to Sprout Microgreens at Home

    IMG_0335

    Imagine having a supply of nutritionally dense, fresh sprouts that you can toss into salads, sandwiches, smoothies (or clearly, any other foods that begin with the letter “s“). And it’s all growing right in your own home!

    If you’ve been wanting to cultivate your green thumb – you’re going to love this tutorial from Cynthea of Super Farmers. She’ll show you just how easy growing your own food is.

    Cynthea is completely self-taught,which you know means she’s had plenty of trials and errors! The story of my life. Ha!

    But her happy obsession (you have to see her house – there are sprouts everywhere 🙂 means she’s learned how to make sprouting easy – especially for beginners.

    home

    Cynthea has her own stylish aesthetic about it too  – sprouting in bowls, mugs and unexpected containers. Nature has become part of her home decor – which gives a fresh feeling to her space!

    Whether you live in a big ol house or tiny apartment – you can absolutely have your own little farm. Just imagine how satisfied you’ll feel – from seed to salad. It must be why Cynthea always has a smile on her face! Let’s join her 🙂

     How to Sprout Microgreens at Home

    tools needed:

    • container – more on that below
    • seeds – buy good quality seeds from a health food store. Also Cynthea supplies seeds through Super Farmers
    • soil – good quality, peat moss soil from a nearby nursery
    • time – depending on the seed it can take up to 14 days. Look on the seed packet and it will tell you.

    Step 1. Prepare your container

    Cynthea explained that we need to make sure the soil has good drainage. So when choosing a container, look for something that you can poke holes into. You can use potting containers – but we like to find ways to repurpose what’s around us!

    What container works best? You can repurpose any plastic food container – like egg carton or berry carton from the supermarket. Cardboard does work, but it will start to break down with waterings. In a future tutorial with Cynthea, we can go more into how to sprout in solid containers like ceramic bowls. But, for now, keep it simple and start with a plastic produce or egg container.

    IMG_0238 IMG_0239

    Step 2. Add Your Soil

    All the pros I speak to agree – that the quality of your plants, depends on your soil! Go for good quality soil that will feed your sprouts and help them thrive. It makes gardening easier on you! Cynthea recommends that you use peat moss. It’s pure, has a good PH and ideal minerals. 

    IMG_0263
    once you’ve filled  your container – give the soil a good watering until it’s moist to the touch. You’ll then be ready to plant your seeds! I told you it was easy! 🙂

    IMG_0267-Edit-Edit-Edit
    Step 3. Plant Your Seeds

    What kind of seeds should you plant? Anything you like to eat! Cynthea says that some of the easier sprouts to grow are: snow pea shoot, sunflower shoots, radish microgreens, greens like bak choy, chinese kale (Kai lan) and basil microgreens. You have plenty of options! 

    Sprinkle the seeds over the soil. If they are big like these snow peas, spacing them out evenly with a bit more room.

    IMG_0275
    IMG_0283

    Step 4. Cover them Up

    Give your seeds a nice cozy blanket, with a light covering of soil. You want to make sure they’re not exposed, but don’t bury them – about 1 cm of soil will do. Then give them another good watering and you’re done!

    IMG_0299

    If you’re using something with a lid, you can even cover them until they begin to sprout and break through the soil. At that point, you can use the lid as a tray, underneath the container.

    IMG_0315
    In about 14 days, this egg carton will be bursting with snow pea shoots, which Cynthea will happily enjoy! Soon, that will be you!

    Common Questions on Sprouting:

    How often do you water your sprouts?

    Give them a sprinkling of water everyday. You don’t want to saturate them, but make sure the soil is always maintained moist. Don’t pour too hard, you don’t want the water to disrupt the soil and expose the seed.

    PRO TIP: Cynthea repurposes a plastic water bottle and pokes holes through the cap to squeeze out a light, even watering.

    When can you harvest them?

    It depends on what you’ve planted – the seed packet should tell you. It’s usually up to 14 days, or when the sprouts reach 2-3 inches tall.

    Will they grow again? 

    No. Once you harvest them, it’s time to start the process again.

    Personally, I think it’s a little easier this way. Your goal is not to keep this plant alive… forever! Sprouting is a low-fuss situation – with a clear beginning and end.

    PRO TIP: You can reuse the same soil 2-3 times to sprout new seeds. Pick out the roots and refresh with a bit of new soil. You’re ready to replant again!


    What do you think – will you give it a try? It’s too easy not to and it’s such a beautiful project to have in your home. I think that you’ll feel so proud of yourself when you harvest your first crop and enjoy the best tasting sprout you’ve ever had!!

    I’m so happy to have a friend like Cynthea to teach me cool things – and now you do too! Check out her workshops or website, Super Farmers – and begin your journey into sprouting!

    IMG_0420

  • Dark Chocolate Body Mask & Moisturizer

    I hope you’re not too gutted when I tell you this recipe is not for eating… but I promise, it’s even better for your body 🙂 This chocolatey treat is a face and body mask, cleanser and moisturizer all in one – that smells just as good as it looks!

    Dark Chocolate Body Mask & Moisturizer Recipe | littlegreendot.com

    I got the inspiration for this recipe from a popular brand that will go unnamed… it rhymes with Hush. I love their cleansers, but making it at home means we can save a lot of money and avoid the preservatives that otherwise need to be used. The idea is that you make a batch and store it in your fridge. It will last for up to one month – and once or twice a week, you grab a pinch and give your skin a good deep clean.

    The ingredient list is incredibly simple and they’re all superstars:

    Raw cacao powder: has an impressive antioxidant measure – even higher than blueberries. It’s going to help repair and protect your skin. Go ahead and eat your raw cacao too! Studies show it may protect against the sun and keep your skin hydrated and plump. For a great healthy treat, try this raw chocolate shake recipe.

    Almond flour (ground almonds): full of oils, lots of vitamin E, it leaves your skin feeling soft and supple. It also acts as a gentle exfoliator, which helps to shed dead skin cells. It’s important to exfoliate weekly, to brighten up dull, tired complexion.

    Green clay (or bentonite clay): clay gives you a deep cleanse. Your skin feels brand new after a good clay mask.

    Natural oil: acts as the binder for our mixture – but more importantly – it will moisturize your skin. My favorites for my face are almond and grapeseed – they’re both very moisturizing, but also very light. You can add a few drops of jojoba, which is great for acne prone skin. Or rosehips oil, great for aging skin. If your skin is very dry, try macadamia oil. Choose one, or do a mixture. (check out my list of 6 best supermarket oils for skin) Which ever oil you choose, always go for a cold-pressed, virgin oil to get all the beneficial properties.

    Dark Chocolate Body Mask & Moisturiser Recipe

    This chocolatey treat is a face and body mask, cleanser and moisturiser all in one – that smells just as good as it looks!

    • 2 tbsp almond flour
    • 1 tbsp cacao powder
    • 1 tbsp green clay
    • 2-3 tbsp oil
    1. in a large bowl, mix in the dry ingredients.
    2. slowly pour in the oil and mix until it can hold its shape, like a play-dough consistency
    3. store it in a jar in your fridge.

    When you’re ready to use it, grab a small pinch. Mix it with a few drops of water until it thins out enough to smear onto your face.

    Work it on and let it sit for 15-20 minutes, to let the ingredients have an effect and to let the clay cleanse your pores.

    Wet your hands and begin to remove the mask in a circular motion to exfoliate the skin as you go. You’ll see your skin is going to feel clean, soft and have a beautiful healthy glow.

    Buy your ingredients online:

    Give it a try and let me know how it works for you!

    Dark Chocolate Body Mask & Moisturizer Recipe | littlegreendot.com

    And if you want more, join 17,000+ subscribers who receive a new recipe in their inbox every Tuesday by signing up for my newsletter below.

  • Superfood Green Smoothie Face & Body Mask

    Superfood Green Smoothie Face & Body Mask | littlegreendot.com

    How’s your summer been? It’s scorching hot over here and while that makes for beautiful bright days, my skin is taking a bit of abuse. I often get emails asking about techniques to improve the skin. I think doing a face & body mask is a great ritual to start – and making it yourself is fun, easy and so inexpensive!

    So this smoothie is going on our skin! 🙂

    Inspired by the summer, I created this cooling mask to help to calm, heal and protect the skin. It smells fresh and green and feels so refreshing on, especially after a hot day outdoors!

    cucumber: A good source of ascorbic acid (vitamin C) which is a well-known antioxidant that heals and protects our skin from free radical damage. Cucumber also has caffeic acid, which helps to prevent water retention ( a great thing for bloating ) but also for our skin, it helps to reduce puffiness.

    aloe: A complete superfood! Aloe is used to heal burns, important for your skin after being out in the sun. Remember, even if you’re not sunbathing, you’re still getting exposed – which leads to damage and early signs of ageing. Aloe is like a moisturiser packed with vitamins – it will leave your skin plump and healthy.

    mint: Gives a wonderful cooling effect to your mask and I love the fresh scent! Mint is great for your complexion, it awakens the skin and gets the blood flowing – leaving you with a fresh glow.

    bentonite clay: clay gives body to the mask – without it, the mask would be to runny to sit on the skin and have any effect. If you don’t have bentonite clay, you can use rice powder or arrowroot powder to bulk it up. Bentonite is my favorite choice because it helps to draw out impurities from the skin, it tightens the skin and leaves you feeling completely cleansed and toned.

    Superfood Green Smoothie Face & Body Mask

    • 1/2 cucumber
    • 1/2 cup fresh aloe or bottled 100% pure aloe gel
    • 1/4 cup fresh mint
    • 2-4 tablespoons bentonite clay
    1. in a blender, blend all your fresh ingredients
    2. pour into a container and add tablespoons of clay until the mixture becomes a thick paste
    3. apply onto your skin (from head to toe)
    4. allow to sit for 20 minutes, wash off with warm water
    5. moisturise with a natural body oil

    Makes 2 full body applications.

    Store your left-over mask in the fridge for up to 5 days.

    Choose your favorite body oil here.


    Jolin modelling the Superfood Green Smoothie Face Mask

    I hope you’re getting as excited about whole food skincare as I am. Just get started, and you could have your first natural skincare product in just 5 minutes!

    And if you want more, join 17,000+ subscribers who receive a new recipe in their inbox every Tuesday by signing up for my newsletter below.

  • Weekly Steam Facial Cleanse

    Beauty-Tea2

    If you like the idea of natural beauty treatments that you can do at home, you’ll love this simple facial treatment. It’s a great healthy habit to start! You’ll be getting a deep cleanse – the steam will open your pores and allow you to unclog and effectively clear your skin of build-up  – which if left untreated, gives your skin a dull and textured appearance. What we want is glowing and smooth!

    By adding herbs, peels and other ingredients to your steam cleanse – you’re going to get all those essential oils and their benefits! You’ll see clearer skin, less oil and breakouts. Follow your steam facial with this mask – you won’t believe how smooth your skin will feel!

    Beauty-Tea3

    Not only will you see better skin, but you’ll be making use of ingredients you already have, which what a sustainable lifestyle is all about! This recipe is more of a guide or inspiration for you to look at what’s in your pantry (or garden!). I’ll offer you some tips for different ingredients that you can use – but I hope you have fun rooting your kitchen and creating your own steam facial blends!

    Here are some ideas for steam facials that you can make:

    Fresh Herbs & Plants: 

    • Mint: invigorating, gets the blood flowing
    • Thyme: great for oily skin
    • Lemongrass:  astringent, cleansing
    • Eucalyptus: cleansing

    Dried Herbs (use your tea bags!) 

    • Lavender: cleansing, good for acne prone skin
    • Rose: astringent, tightens the pores
    • Chai: the cinnamon, cardamon and spices are great antiseptics and cleansers

    Rinds and Peels (don’t throw them out): 

    • citrus peels are loaded with essential oil that stimulate and cleanse our skin

    Any combination works beautifully. I love breathing in the scent of Chai tea, but here are some other ideas:

    • Orange & Mint would be great for tired skin
    • Rose & Lavender for oily skin
    • Lemongrass & lemon for a good thorough cleanse

    All you need to do is give yourself the 15 minutes a week to do this steam cleanse – and be consistent with it. Sometimes that’s the hardest part – sticking to a new routine. But it’s exciting when you see the great results! Here’s a tip: choose a day in the week that will fit your schedule for your steam cleanse  – you needn’t worry about buying ingredients or prepping anything, because you’ll be using what available to you and you can always switch it up.

    It’s to easy not to try and your skin will absolutely love it!

    Beauty-Tea-Ingredients

    Weekly Steam Skin Cleanse Recipe

    Ingredients:

    • large bowl and towel to cover your head
    • boiling hot water
    • your choice of fresh herbs and plants, dried herbs or citrus peels

    Directions:

    1. wash your face
    2. add your ingredients into a bowl
    3. pour in the boiling water
    4. sit over the bowl with a towel over you head to receive the steam
    5. end with a toner and your favorite natural serums or moisturisers
    6. remember, after a steaming your face, your skin will soak up whatever you put on it – so don’t use any chemicals or synthetic products!

    steaming tea

    PS: From this to That – Smoothies and Facials

  • Hemp & Argan Hair Oil Treatment

    Hemp & Argan Hair Oil Treatment | littlegreendot.com

    A good hair oil works in two ways: massaged onto the scalp, it helps to nourish and fortify your hair follicles. Worked onto the hair, it helps to moisturise and seal your strands. I showed my friend Holly a really simple recipe, that uses some of the best oils for our hair. Once you have them on hand, you’ll be able to make a beautiful product at home that can be found in any high-end salon!!

    Hemp & Argan Hair Oil Treatment | littlegreendot.com

    Hemp Seed Oil: This oil is rich in essential fatty acids, vitamins and is 25% protein. You’re hair will drink it up! It’s packed with vitamin E, so a good massage on the scalp will feed in those antioxidants. Remember, healthy hair begins at the scalp. You can eat this oil too! Always eat it raw, unheated, in salad dressings, dips or in smoothies – and you’ll get those healthy benefits internally too.

    Argan Oil: Prized as a moisturising oil, it’s very light weight but also very hydrating! Argan Oil is multi-use, not only will you use it in this recipe, but you can use the oil as a skin moisturiser. It’s great for under the eyes, your cuticles and any dry spots of skin.

    Rosemary Essential Oil: My friend Alina, of Abundant Earth once told me that she adds rosemary oil to every hair blend she makes! She’s an incredibly informed herbalist, so I listen! Rosemary essential oil is antibacterial – massaging it onto the scalp helps to cleanse hair cuticles from bacteria that can cause scalp irritations. It feeds the scalp with antioxidants and helps to stimulate blood flow – all which leads to healthier hair.

    These ingredients combined will produce an oil that your hair will absolutely love!  Use it once a week – I like to put it on at night, then wash it off in the morning. The trick is to set a routine that works with your schedule. You’ll see – your hair will soon feel stronger and healthier with very little fuss!

    Hemp & Argan Oil Hair Treatment Recipe

    • Hemp Seed Oil
    • Argan Oil
    • Rosemary Essential Oil
    • dark glass bottle
    1. use a small, dark bottle to better help preserve the oils.
    2. fill it with your blend: two parts hemp seed oil, one part argan oil
    3. add in a few drops of rosemary essential oil, 5-10 drops for every 1/4 cup of oil blend.

    How to use:

    1. on clean hair (not covered in product), begin at the scalp. Give yourself a good massage with the oil – take your time here! We tend to focus on the hair, but healthy hair begins at the scalp!
    2. work the oil down onto the strands
    3. tie your hair up in a bun, or braid. Allow to sit for 20 minutes or overnight
    4. wash as normal
    5. you can use a tiny small amount onto dry hair to help tame frizz
    6. you can also use this blend for your skin! It’s multi-use and rosemary is often used in anti-ageing care products for its antioxidants – so you’ll get lot’s of great use with this! Dab it around your eyes, use it on cuticles or even as an all-over nighttime moisturiser.

    Hemp & Argan Oil Hair Treatment Giveaway

    This giveaway has now closed. Congratulations to Angela Molinaro in Singapore. Her shopping cart is winging its way to her now! Thanks to everyone who entered – watch out for the next Recipe + Giveaway!

    It’s a giveaway!! Win a shopping cart filled with everything you need to make the hair treatment, delivered straight to your door! It’s that simple! Here’s how to enter:

    • Sign up for the weekly Little Green Dot newsletter and get 1 chance to win
    • Don’t forget to confirm your subscription in your email (because we hate spam!)
    • Get bonus chances by following Little Green Dot on Facebook,Pinterest & Instagram!

    The contest will run until the end of July and then we’ll pick a winner! Good luck!

  • June giveaway winner // drumroll…

    We had almost 400 entries for the Recipe + Giveaway! The whole idea was to not only inspire making – but to give the tools you need to start! I’m so excited for this month’s winner – this recipe is one of my favorites!

    giveaway

    Congratulations to Jennifer Perry! So happy for you!!

    Don’t forget, even though the giveaway is closed you can get all the ingredients you need for the Superfood Body Mask right here.

    p.s. June Recipe + Giveaway: Superfood Body Mask Recipe

  • Tips for Creating a Hands-on Lifestyle

    During my recent Simplify workshop, we talked about creating a more hands-on lifestyle. Of course, we’re all busy and strained for time, but if we want a life that is about simplicity, creativity, making positive choices and having skills to live more sustainably – from my experience, it takes a bit of planning.

    making

    If you like the idea of making some of what you normally buy  – the trick is to set yourself up for success. Here are three tips for creating an environment that will make that easy for you. At the end of the day – it needs to be easy – or it won’t stick. This is what I’ve done:

    Step 1: Start small – When I first started making a few years back, I spent half my time pinning recipes and the other half just making a big mess! Never spending enough time to really understand or learn the process of what it was I was trying to do. Mostly, I ended up disappointed with my results. I didn’t label things, so I’d forget what what I’d made. I had ingredients and half-attempted recipes all over the house… it was the total opposite of simplicity!

    I’m now enjoying the idea of mastery. It’s a slower process, more involved, but much more gratifying. The book Cooked: A Natural History of Transformation captured this concept for me, where Michael Pollan immersed himself for a year – learning four basic recipes. Think of one recipe or skill you’d like to master, and dedicate time to it. Maybe it’s your household cleaner,  maybe it’s making compost at home – or simply making your weekly hair rinse. Start small, learn the process, practice often and build your repertoire from there.

    product

    Step 2: Buy or gather all of the ingredients. Just like cooking, strive for a mise en place approach. Make sure you have everything you need to create what you want. Take time to think about the details before you start making. Like bottles you’ll need, how you’ll label them… I think it’s a good idea to go to workshops or speak to friends who are already doing the things you want to learn – to pick up these early tips!

    materials

    Step 3: Set up your work space . Choose a container or space in your home to organize your tools, ingredients and materials. Your space should be beautiful, useful and inspiring to you.

    Space

    These tips have really helped me, and hopefully they help you too 🙂  I’d love to know what your process of making looks like… what works for you, what doesn’t?

  • Superfood Body Mask // Recipe + Giveaway

    How many times have you seen a recipe and thought, “I’ll make it one day, as soon as I buy all the ingredients… ”  But, we all know what happens – time passes and we never end up making it! Well, not this time! For this recipe, you can enter our giveaway for the chance to win all the necessary ingredients, delivered straight to your door! And it’s open to 25 countries!! Sounds good? Let’s start making!

    Superfood Body Mask Recipe

    body-mask

    This particular bodymask recipe is one of my favorites. All of the ingredients are pure super foods for the skin:

    Bentonite Clay: Comes from volcanic ash, it helps to draw out impurities from the skin. You feel absolutely cleansed after a good clay mask.

    Oat Flour: Soothing and moisturising – it helps to calm inflammation, irritations and when mixed with water, it produces a gel that is nourishing and protective.

    Aloe Gel: Incredibly hydrating, it’s like vitamin water for the skin. Aloe is packed with nutrients and minerals and helps to heal and protect the skin.

    Almond Oil: Packed with Vitamin E, an antioxidant that’s helpful against free radicals (like those caused by the sun) that can cause damage and wrinkles. Almond oil is a very light-weight oil, it moisturises the skin and is quickly absorbed.

    Ingredients for one full body application: 

    • 4 tbsp bentonite clay
    • 4 tbsp oat flour
    • 2 tbsp aloe gel
    • 2 tbsp almond oil
    • optional: juiced cucumber (or water) if you need to thin out the paste

    Directions:

    • mix all of the ingredients together in a bowl. You want a consistency of a thick paste that will stick onto the skin – not crumbly or too wet.
    • apply all over  and allow to sit for 10 minutes
    • wash in the shower
    • moisturise with pure almond oil afterwards

    Shopping guide:

    Superfood Body Mask Shopping Cart Giveaway

    recipe-and-giveaway2

    This giveaway has now closed. Congratulations to Jennifer Perry of the United States. Her shopping cart is winging it’s way to her now. Want some inspiration for your green life? Check out Jenn’s Pinterest boards for thousand of fun, natural ideas!

    It’s a giveaway!! Win a shopping cart with everything you see in the picture, delivered straight to your door! No excuses – you can make your own body-mask at home! Here’s how to enter:

    • Sign up for the weekly Little Green Dot newsletter and get 1 chance to win
    • Don’t forget to confirm your subscription in your email (because we hate spam!)
    • Get bonus chances by following Little Green Dot on Facebook, Pinterest & Instagram!

    The contest will run for a week and then we’ll pick a winner! Good luck!

    [promosimple id=”4e76″]

    p.s. Trouble viewing the entry form? Click here to enter instead!