Category: Ingredient Education

  • Brown Sugar in Body Scrubs: A Deeper Dive.

    Brown Sugar in Body Scrubs: A Deeper Dive.

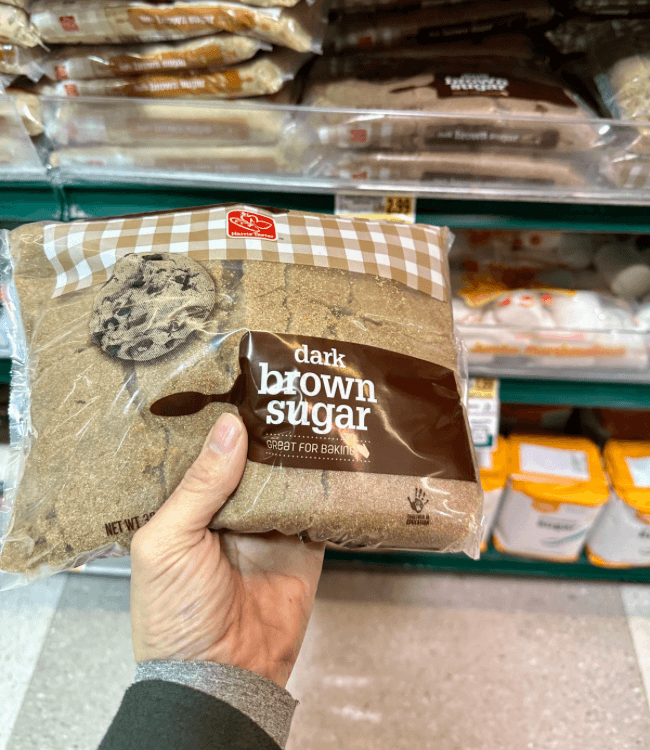
    Brown Sugar in Body Scrubs: A Deeper Dive

    When it comes to making body scrubs, some people like to use sugar for drier skin, and salt for more oily skin…

    My favorite ingredient to use in body scrubs – for all skin types – is dark brown sugar.

    I find that it makes a scrub that feels moister on the skin… and it’s very good, especially for sensitve skin. There’s a well known brand that makes a brown sugar scrub especially for people with eczema () When you read the reviews, people love how effective yet gentle it is.

    • Here’s another brown sugar scrub sold in Sephora, it’s pricey – and the main ingredient is brown sugar… ()

    They’re both made with this simple, pantry ingredient! And you can make your own version at home too.

    Here’s what makes brown sugar so special:

    The Magic of Molasses

    First off, the reason brown sugar is, well, brown, is because of molasses. This thick, syrupy goodness isn’t just for flavor; it’s packed with benefits for your skin.

    • Rich in Nutrients: Molasses contains minerals, like magnesium, that interact with the skin’s surface layers. It can help improve the skin-barrier, enhance skin hydration, and provide a natural antibacterial effect.
      • Research Note: This study looks at the effects of bathing in magnesium-rich Dead Sea salt to improve skin barrier functions. The participants bathed for 15 minutes, in a 5% salt solution ()
        – I don’t think we can expect the same level of results in a body scrub (wash off product) but it’s interesting to see how magnesium-rich ingredients work on the skin. I leave the scrub on as a mask to receive more of those benefits.
    • Natural Moisturizer: It helps in locking moisture into the skin, thanks to its humectant properties. Honey works in this way too.
    • Antioxidant properties: Contains polyphenols and vitamins with antioxidant effects. When you use a whole food ingredient like molasses, you get the synergetic effect of the ingredients. The mineral content helps to compliment the actions of the antioxidants.
    A Creamy, Satisfying Texture

    When you apply brown sugar onto wet/damp skin, it melts into a creamy texture that’s just so satisfying to scrub all over yourself. It glides over the skin smoothly, making your exfoliation routine feel like a luxurious experience. Plus, it’s gentle enough not to irritate but effective enough to leave your skin feeling soft and renewed.

    • Recipe idea: This is a brown sugar scrub that I make at home. I love how creamy it is! ()
    That Warm, Comforting Scent

    Let’s not forget about the scent! Brown sugar has this warm, sweet aroma that makes your scrubbing experience even more delightful. This aroma can be incredibly soothing and adds an aromatherapy aspect to your skincare routine.

    • Tip: add kitchen aromatics to enhance the fragrance – for example orange zest, ginger powder, and vanilla extract.

    So, there you have it – a deeper look at why brown sugar is such a fantastic choice for homemade body scrubs. Its combination of skin-loving properties, creamy texture, and comforting scent makes it a standout ingredient. Whether you’re new to homemade scrubs or a seasoned DIY-er, brown sugar is an ingredient that won’t disappoint.

    Get ready to indulge in this sweet treat for your skin!

  • 8 Best Ingredients for Making Skincare at Home

    8 Best Ingredients for Making Skincare at Home

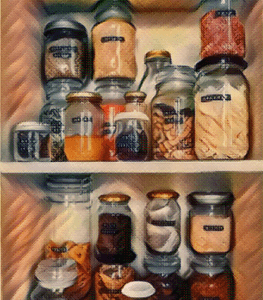
    kitchen skincare


    People have used whole food ingredients to make skincare remedies for as long as we know.

    The most tried-and-true remedies are made with simple ingredients, like grains, herbs, oils…

    It just takes getting to know these ingredients, and having a go at making the recipes.

    From your kitchen pantry, you can make salves to soothe aches, baths to ease itching… you can make the best scrubs, haircare… everything you need!

     If you’re interested in making skincare recipes at home, these are (in my opinion) the best ingredients to have, and to learn more about:

    Table of contents:

    Oil

    Why I use it:

    Oil softens, nourishes the skin, and reinforces the skin barrier functions. 

    What I use it for: 

    • As a base for making herbal infusions. 
    • For oil cleansing
    • As a moisturizing body oil
    • To make salves, and body scrubs. 

    What I recommend you get: 

    Use supermarket oils, like almond, grape seed, avocado, hazelnut…
    Look for unrefined, cold-pressed, or virgin oils. These are minimally processed and retain more of the plant’s nutrients. 


    Honey

    Why I use it:

    Honey is nutritious for the skin, antimicrobial, and has a cleansing effect that also promotes healing. It improves functions of the skin (cell turnover) which has a brightening effect.

    What I use it for:

    • As a base for making herbal infusions 
    • For face cleansing
    • In facial masks

    What I recommend you get:
    Local honey, direct from a beekeeper, often found in farmer’s markets. Or in supermarkets, look for raw honey which is not heat processes and retains its nutrients


    Apple Cider Vinegar

    Why I use it

    Vinegar is acidic, and helps to restore/maintain the pH of the skin. It supports the integrity and functions of the skin’s acid mantle. *It’s important to dilute the vinegar before applying it on the skin: 2 tbsp vinegar /1 cup of water

    What I use it for: 

    • As a base for making herbal infusions 
    • As a facial toner (at night, to prevent issues with sun exposure) 
    • As a weekly, clarifying hair rinse. Scalp care. 

    What I recommend you get: 

    Apple cider vinegar with the mother is what herbalist use to make internal herbal remedies, and it’s what I use for external remedies too.


    Salt & Sugar

    Why I use it

    The grains provide a physical exfoliation for the skin.

    What I use it for:

    • Body scrubs only. I do not recommend salt and sugar grains for the face.

    What I recommend you get:
    You can use the cheapest, generic salt and sugar from the baking section. This is a wash-off ingredient, it only provides the physical texture we need (its not for skin nourishment).

    Choose a fine grain, which is more gentle on the skin.


    Rolled Oats 

    Why I use it

    Oats are, in my opinion, the best skin care I’ve used. It’s an all in one: cleanser, moisturizer, deep nourishment, exfoliator….

    I always grind oats into a fine powder, wether I’m using it in a bath, for a facial mask, or a scrub – it needs to be ground.

    What I use it for: 

    • Powdered oats is my secret ingredient for scrubs.It makes the scrub creamy when applied over wet skin! 
    • Facial cleanser and exfoliator 
    • Face and body masks 
    • Bath blends 

    What I recommend you get: 

    Whole, rolled oats are more shelf stable than buying pre-ground oat flour. I like to grind my oats fresh, before using it in a recipe. Get any brand of whole rolled oats, but not instant oats.


    Herbs, dried and fresh

    Why I use it:

    Herbs are the superfoods of the plant world, rich in nutrients. Learn about your herbs, so that you can know how to pick the best herb for what you’re making.

    When it comes to making skincare – any herb that you drink as tea, you can use topically.

    What I use it for: 

    • I choose specific herbs for their therapeutic/emotional benefits. 
    • I use herbs in pretty much all of my skincare recipes.
    • Baths, hair rinses, skin washes

    What I recommend you get: 

    When preparing herbs for topical use, we need to grind it into a powder.
    I prefer to buy whole herbs, its more shelf stable than buying pre-powdered herbs. And then I grind it as needed.

    Get what you have access to: whether it’s herbal tea bags, bulk dried herbs, or fresh herbs that you dry and dehydrate at home.


    Cacao Butter

    Why I use it:

    Cacoa butter is an occlusive, it helps to protect and condition the skin. Used to prevent stretch  marks.

    What I use it for:

    • I add a touch of butter to my salves, to thicken the consistency, and enrich the feel on the skin.
    • In bath recipes, I like to grate cacao butter and add it to salts, and bath bombs.

    What I recommend you get: 

    Look for unrefined cocoa butter, sold in health food stores and sometimes in the baking section of supermarkets.


    Freeze-dried Fruit

    Why I use it:

    Freeze-dried fruit are full of skin-beneficial nutrients (lots of vitamins, antioxidants, and gentle acids) It also adds color, and scent to recipes.

    Because the fruit is completely dried, it can be ground into a powder, and has a long shelf life (as long as you store it properly)

    I wrote more about using freeze-dried fruit here: link

    What I use it for:

    • I powder them, and add them to scrubs, bath bombs and facial/body mask
    • I infuse freeze dried fruit into oil, vinegar and glycerine.

    What I recommend you get: 
    In some supermarkets, you might find freeze-dried fruit either in the produce section, or the snack section next to things like nuts and dried fruit.

    Freeze dried fruit is different from “dried fruit” Make sure it says “freeze dried” which is completely bone-dry, and can be ground into a powder.


    Ingredients Resource
    online shopping guide

    Check out my guide for where to buy everything from shea butter to medicinal herbs to colloidal oats online.

  • The Common Herb for Skin Series: MINT

    The Common Herb for Skin Series: MINT

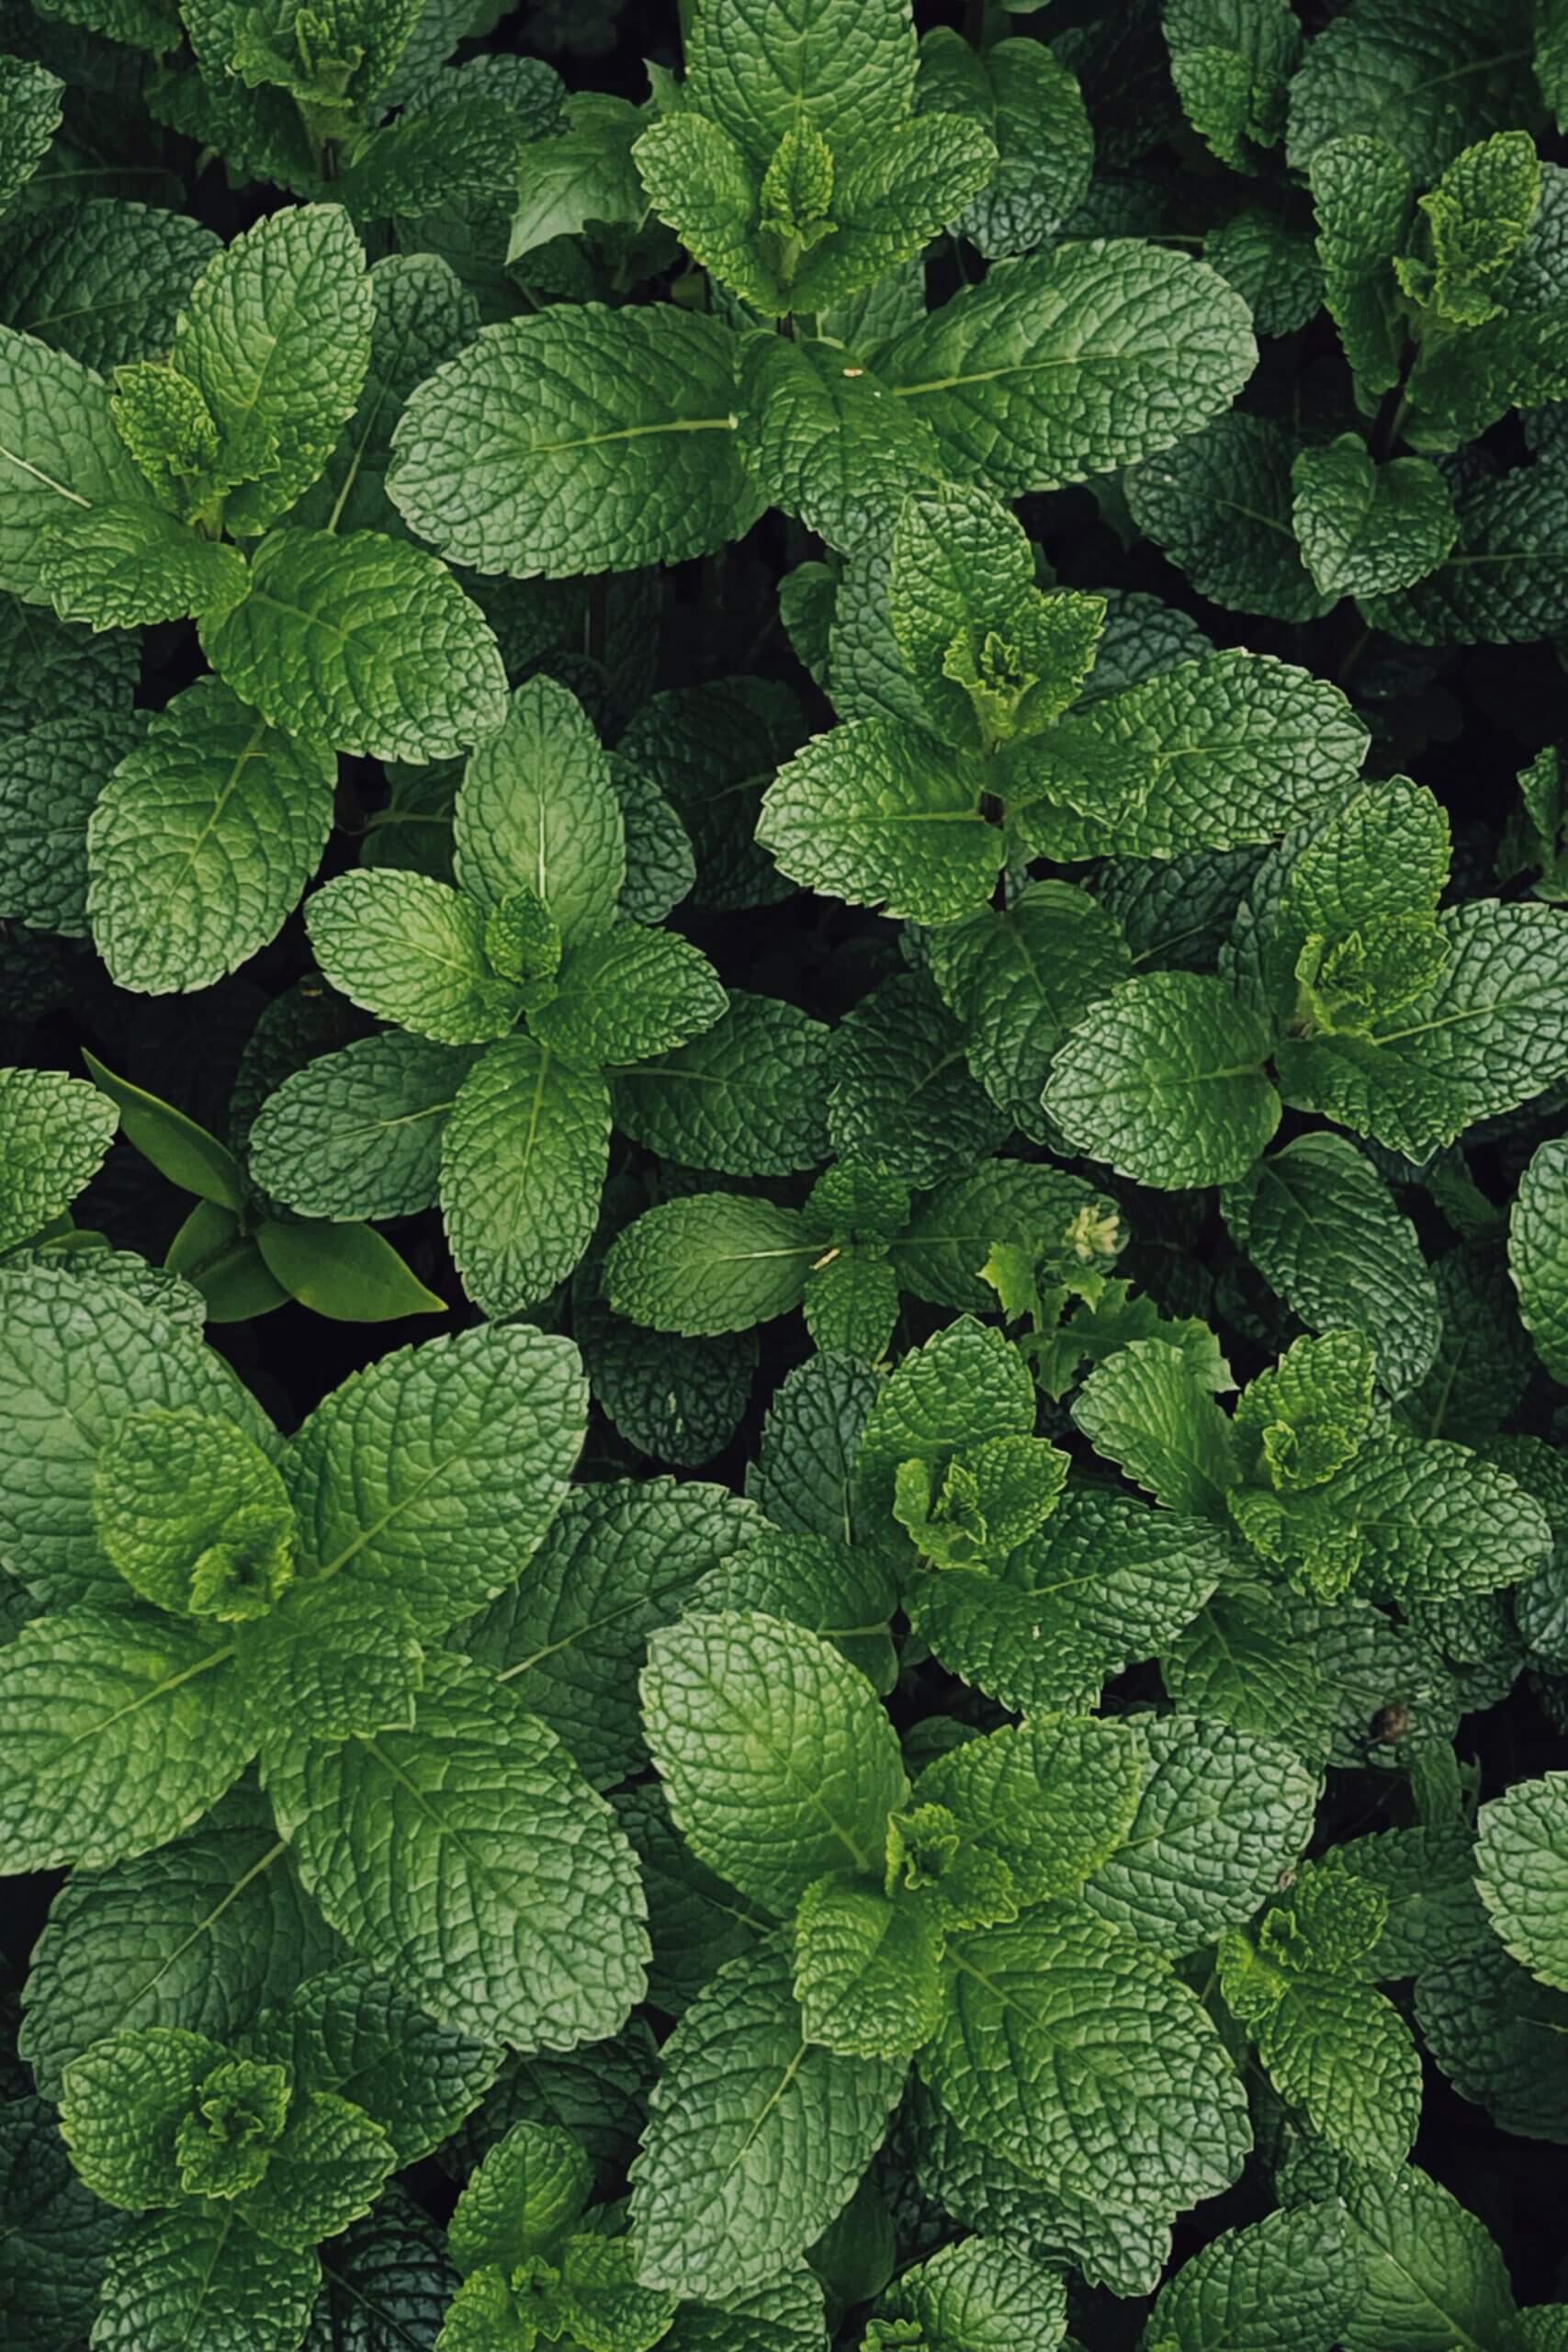
    This series celebrates the common herbs, because in a world of novelty – it’s easy to forget the benefits of the humble, accessible supermarket herbs for the skin, body, and mind.
    And more importantly – the abundance of wellness you have access to.

    Mint (Mentha x piperita
    Herbal Actions: Analgesic, Antispasmodic, Nervine, Antimicrobial

    The refreshing aroma of mint definitely wakes you up  –  but mint actually has a calming effect on the body, and nervous system. It soothes and relaxes cramping muscles, tension and anxiety. 

    And this is true for all mints! Peppermint, spearmint, apple mint, chocolate mint… all different varieties of mint have been studied and found to have therapeutic effects…

    Peppermint showed the greatest effect because it has the highest amount of menthol, which is responsible for that soothing, numbing, therapeutic action. 

    The Herbal Actions of peppermint – and how they work

    PAIN & CRAMPING

    As an analgesic and antispasmodic, mint offers relief from pain and muscle spasms. Studies have shown that applying peppermint essential oil on the skin helps to relieve itching and pain on the surface of the skin, and deep down into muscular and nerve tension. (ref)

    Researchers found that it works because the menthol in peppermint affects Kappa Opioid receptors, which turn on pathways in the nervous system that inhibit pain and discomfort. Plus, it also increases the cell’s threshold for stimulation – so the sensation of pain isn’t as easily triggered. (ref) Makes me think of the practice of cold showers, you build up a resilience to stress…

    The best way to use mint for itch and pain relief
    is to apply peppermint essential oil on the skin over skin irritations, bites and stings, aching muscles, menstrual cramps, upset stomach, and on forehead and temples for headaches. (ref)

    Make a salve with peppermint infused oil, and add in peppermint essential oil at 2% dilution, for a more potent remedy. Use it as needed directly over the areas where you feel discomfort. Avoid eyes and mucus membranes.

    Also, drink peppermint tea – for the same reasons and benefits.

    It’s a great after-dinner drink, especially if you experience digestive issues, cramping, or bloating, you can also make a peppermint cordial or tincture. Add some peppermint to any digestive or menstrual tea blend, for those calming and soothing benefits. It also brightens and uplifts the flavor! 

    STRESS & ANXIETY

    As a nervine, mint relaxes stress and anxiety. Especially when you notice you’re stuck in a negative mindset and ruminating thoughts. 

    The aroma of mint jumps up and grabs your attention. It lifts you out of a stressful mental state – and gives you the ability to breathe and reset. Peppermint has been studied in hospitals and found to soothe patient fear and anxiety before surgery, and also helps to relieve nausea after surgery. (ref) It’s good to have mint around – when you’re going through any form of physical and mental stress. 

    What’s happening is that the menthol in peppermint stimulates endorphins, the happy hormone that increases pleasure and reduces pain and discomfort. (ref) Your mood is uplifted – and then at the same time, it stimulates the hippocampus, which improves cognitive function and memory.

    You’re able to focus your mind and think clearly. This is why peppermint is great to use during study and work.

    You might also want to breathe in peppermint before making decisions – so that you’re in a relaxed, clear state of mind – and your cognitive functions are switched on! 

    It’s beautiful the way peppermint uplift your spirits and clears your mind, and at the same time, keeps your body calm and relaxed. The combination is a state of being that we all strive to feel: comfortable in your body, focused, and enjoying the present moment. 

    BACTERIA 

    As an anti-microbial, peppermint supports a healthy, balanced community of flora on the skin. It has antibacterial, antifungal, and antiviral properties – so it covers the bases!

    When your skin is compromised (impaired), bacteria that ordinarily live on the skin with no issue – can create infection and inflammation, basically stress out your skin.

    Congested pores can create an opening for bacteria to enter and cause havoc – activating your inflammatory responses and creating itchy, red, inflamed pus-filled bumps that we see as pimples. Usually, the bacteria responsible for this is Staph, which lives on the skin at all times.

    And so, using antimicrobial herbs on the skin simply helps to support the skin and prevent opportunistic bacteria from proliferating and causing distress.

    Peppermint is shown to have moderate effects against bacteria. It’s not our heaviest hitter in the herbal world and it’s hard to tolerate higher concentrations of peppermint on the skin. You could increase antibacterial activity in your skincare preparations by blending in other herbs like lavender, Thyme and Myrrh.

    I feel that the greatest benefit of using peppermint for breakouts – is the relief from discomfort, itch, and pain that it provides.

    Roundup: Ways that Mint can be useful in daily life

    • Mint tea for digestion: Drink mint tea after dinner, or when you feel digestive discomfort.
    • Mint aromatherapy for stress & focus: Use mint aromatherapy during work and study. Spritz it in the air to boost your concentration, and snap you out of distracting mental loops.
    • Mint skin care for aches and pain: Make a mint balm to rub on your forehead when you feel tension headaches, on aching muscles, or on your abdomen to relieve cramps.

    5 wellness products you can make with mint

    1. Mint Syrup

      Make minty after dinner tonics, and cocktails to soothe your belly after a meal.
      Or for anytime you feel digestive/menstrual discomfort.
      Mint sryup recipe
    2. Soothing Salve 

      A salve has a creamier consistency, that you can rub into aching muscles and cramping belly.

      To make your salves, use peppermint infused oil + a 2% dilution rate of peppermint essential oil for therapeutic aromatherapy. You could even use this salve over your cheest when you feel congested.
      Balm/Salve Guide – from the Infused Herbal Oil Workshop
    1. Mint Roller Ball

      Rub on the temples when you have a headache, or over itchy bites and stings. You can also make a balm if you prefer that application. For the roller ball use peppermint infused jojoba oil or fractionated coconut oil with a 2% peppermint essential oil dilution.

      10ml roller ball = 6 drops peppermint essential oil

      You can use pure peppermint, or a good idea is to blend peppermint + spearmint
      You can also blend other essential oils. Lavender + peppermint compliment eachother therapeutically for pain/stress
    2. Mint Aroma Mist

      Spritz in the air anytime you need a mental reset and boost. It’s great to have our computer, when you’ve been staring at a screen for too long! Becuase of the high amount of alcohol (needed to solubilze the essential oil) this spray is not for the skin – you can spray your clothes.

      2oz spray bottle
      1 part ethanol alcohol (high proof!)
      36 drops of essential oil.

      Its good to blend peppemint with other essential oils, so it’s not too sharp!
      (I love 25 drops White fir + 11 drops peppermint) Sweet Orange is also great for stress!

    3. Belly Soothe Tea

    Make your own tea blend, something as simple as peppermint + ginger work together to soothe discomfort.

    1 inch grated ginger root
    2 cups of water
    Bring to boil, then shut off the heat. Let sit for 10 minutes
    Add peppermint leaves. Let it sit for another 5 minutes and then strain and drink.

  • How to use Violet flowers & leaves in your skincare

    How to use Violet flowers & leaves in your skincare

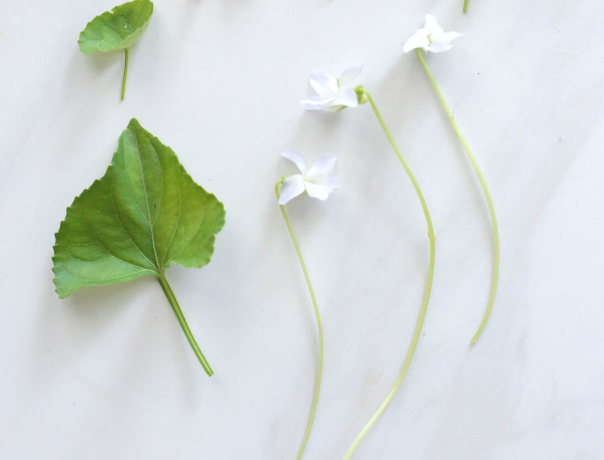
    If you’ve been wanted to bring more herbs into your skincare, violets are a great one to try! They’re gentle and nourishing, and bring flow and moisture back to the skin, especially nice after the Winter season.

    When you plant violets in your garden, they will spread very quickly, a welcomed weed, violets add beauty & wellness to your life!

    In this article, let’s explore Skincare Herbalism – and learn the benefits that violets offer, what skin conditions and constitutions violets are a good match for and how to use them in your skincare – wether you grow violets or purchase dried violet leaf from an herbal supply store. 

    Violet (viola spp.)

    • Herbal energetics: Cool, moist
    • Herbal tastes: Pungent (Ayurveda and TCM)
      sweet, older leaves are bitter
    • Herbal actions: Anti-inflammatory, antioxidant, nutritive
    • Constituents: Mucilage, flavonoids, saponins 
    • Parts used: Flowers, leaves (even when violets are not actively flowering, you can still access the medicine in the leaves, often throughout the year.)

    HERBAL ENERGETICS: Violets have a cool, and moist constitution – which is a good match for people with a hot, dry constitution or condition.

    As the sun warms up in the season, heat can aggravate the skin – sunburns, redness, inflammation, dehydration… Violet, with its cool and moist nature, is a great companion during this time to keep the skin calm. 

    You can also incorporate violet to bring cooling, moist balance to your herbal blends especially blends with herbs that are hot, dry, detoxifying, and purifying – like clay, rosemary, sage, thyme, ashwagandha, frankincense, reishi…

    The “moist” element comes from mucilage in the leaves.

    Historically, violet is used to treat dry-lungs, you can make violet infusions to drink when you’re feeling dry internally, a dry throat, or dry cough.

    Mucilage is best extracted in cold or warm water, not hot. To extract mucilage, make a violet leaf infusion, using cold water and infusing overnight under the moonlight. This is a “moon tea”, which is sweeter, more delicate in flavor than a “sun tea”

    HERBAL TASTES: The pungent taste comes from aromatic volatile oils. Violet absolute is used in perfumery for its green, powdery, and feminine. The essential oil is used in aromatherapy for its calming effect on the body, mind, and heart.
    Volatile oils have a stimulating effect, violet is calming and soothing – in a gentle way it sparks and encourages transformation.

    Violet is also a sweet-tasting herb, which indicates it has a nourishing, nutritive quality. It is rich in flavonoids, antioxidants that help prevent unwanted inflammation. The leaves are delicious, especially the young leaves – fresh, green, and slightly sweet. It’s nice to pick and eat from your garden, add the leaves to salads. 

  • How to Prepare Fresh Moringa for Skincare – and why you want to!

    How to Prepare Fresh Moringa for Skincare – and why you want to!

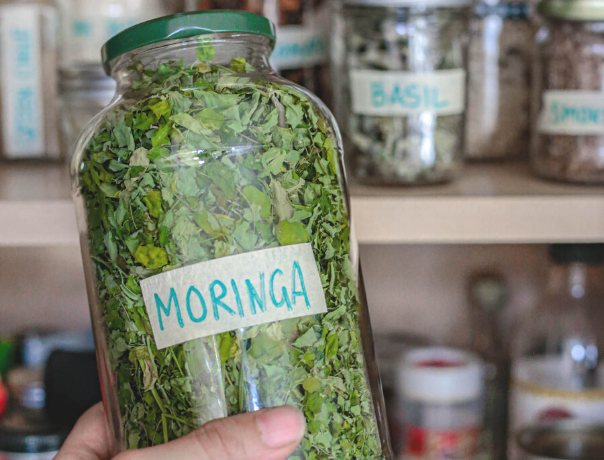
    I have never grown a more easy plant than the Moringa! 

    Its called the “healthiest plant” and grows wildly abundant. In one year, it can grow up to 22 feet or 7 meters if you let it! Its a heat-loving plant, and sub-tropical cultures all around the world in South America, Africa and Asia have a long relationship with moringa, and cook with the leaves. 

    A little moringa in your food and skincare – adds a HUGE boost of nourishment!

    In this article, we’re going to prepare and preserve fresh Moringa to be used topically to nourish your skin. We’ll talk about the benefits and how to use it.

    Benefits of Moringa for Skincare

    As an herbalist, I don’t really seperate what’s good for your body and what’s good for your skin. In my world, we’re consuming whole foods, inside and out. The skin is your largest organ – and it requires nutrients from food to create healthy cells, to heal and function optimally. 

    The difference with “feeding” the skin, is in how we prepare the ingredients. I’lll show you that in detail below. 

    First, let’s take a look at the benefits Moringa Leaf for your skin (and body). 
    Click below to read more on each:

    Herbal Actions

    Anti-oxidant, Anti-inflammatory, Anti-microbial, Nutritive

    Antioxidants help the skin better respond to stress with resilience. 
    Anti-inflammatory and Anti-microbial are important for skin that is healing, for clearing breakouts, and preventing infection. 
    Nutritive herbs provide high amounts of nutrient to the body

    Chrolophyll

    Moringa has a high content of chlorophyll, which on the skin has a protective and anti-inflammatory effect. It also acts as a purifier, cleansing and  releasing toxins in the skin.
    Chrolophylll is very good for all skin types, but especially good for skin experiencing acne and breakouts. And for those who live and work in environments where there is toxin or pollution in the air.

    Vitamin A

    A natural retinol that helps to promote healhty skin regeneration and slow down the signs of aging.  Many anti-aging products on the market are made with an isolate of retinol which can be harsh and aggravating to the skin. Vitamin A, as part of a complete whole-food packet of nutrients, is very gentle and can be used daily in your skincare. 

    Vitamin C

    Vitamin C is a very important skincare nutrient – it helps to promote collagen. It brightens the skin and helps to prevent hyperpigmentation.
    Vitamin C is very fragile, and can be lost in the drying process. If your goal in using Moringa leaf is to help create brighter, even skin tone, make sure to dry the leaves in a very low temperature.
    You can also use fresh moringa, and prepare a fresh skincare mask. Remember that vitamin C is water soluble – you might blend fresh moringa with avocado, and a little water to draw out the vitamins. 
    Another option, is to infuse fresh Moringa into witch hazel, and create an herbal extract or tincture for your skin. You can then apply this green-tinted witch hazel over areas where you have hyperpigmentation. 

    Minerals

    Moringa is wildly rich in minerals, including magnesium, calcium, sulfur… 

    Minerals are the building blocks of healthy cells, and help with the processes of the skin and in retaining hydration. To benefit from minerals topically, you might want to create a moringa bath. Blend dried moringa into epsom salts and soak in the dark green, mineral rich waters!

    To preserve the Moringa leaves, you want to  dehydrate it and remove all the water content.

    You can do this it in a slightly warm oven – but I always forget to check – and have burned too many things. So I use a dehydrator. This is the model that I use, its not fancy or expensive but it does the job.

    If you plan to preserve food regularly and make skincare, a dehydrator is a worthwhile investment. I wrote a comprehensive buying guide that you can read here. 

    Dehydration Method: Haphazardly fill the trays with Moringa stalks (its totally fine if it overlaps) Set to (95 F / 35 C) for about 4-6 hours, or until totally dry.  

    This low-and-slow method removes the water content, but helps to preserve the nutrients. 

    Paper Bag Method: Or, you can place fresh Moringa leaves in a paper bag and let it sit in a dry area until it becomes crispy dry. If you do this method, remove the thick stalks, and only dry the leaves so that it all dries evenly. 

    Creating Moringa Powder from Dried Moringa Leaves


    Once the leaves are dried, you can blend it in a blender into the most vibrant green powder – blasting open the cells walls of the plant, and making the nutrients available for your skin. 
    You do need to store it carefully, as more of the surface area is exposed to oxygen it can begin to degrade more quickly. Powders generally have a shelf life of 6 months.
    I recommend that you keep it in the freezer, where it will stay bone dry, vibrant and fresh.
    Powdering Method: If you haven’t already, remove the stems. They’re so fibrous, like strands of thread, and do not powder easily at all! Toss the leaves into a blender, bullet blender or coffee grinder (that you don’t use for coffee) and blend until powdery fine. 

    I’m taking a recipe from my book, Super Greens Powder Mask – but using our freshly made Moringa powder instead! Its smart to use the recipes in the book as a base – and play with the ingredients! Check out the book here. 

    RECIPE USING MORINGA POWDER

    To address hyperpigmentation and aging skin – I would add Moringa powder to the Vitamin C Mask which is a recipe that you can find in my book Natural Homemade Skincare, pg 94.
    Rich in protein, vitamins and minerals…. moringa is amazing for healhty hair growth! You might infuse moringa leaves into a plant oil or apple cider vinegar and make hair treatments.
    Here today, I’m leaning on the purifying. brightening and nutritive qualities of Morniga to make a powdered cleanser that you can also wear as a mask. I’ve been using this blend recently, and my skin looks much brighter, it feels smoother in texture and softer!
    You could even make a large batch of this powdered blend, and scoop it into a bath with sea salts or epsom salts for a purifying, mineral rich soak.  This would be especially good if you’re treating the whole body, or addressing body acne


    Sweet Moringa Cleansing Mask

    Ingredient Spotlight: 

    • Moringa: helps clear impurities from the skin, promote healthy regeneration and bright complexion. Great for all skin types, and for acneic conditions.
    • Licorice Root: rich in saponins, makes a good natural cleanser. Helps to even out skin tone. The “sweet” in the name, licorice root has a sweet taste, like sugar! Sweet tasting herbs strengthens and nourishes your skin’s vitality.
    • Kaolin Clay: gentle clay that gently stimulates, deeply cleanses and brightens the skin.

    Want to know how to choose the best herbs for your skin’s needs? Click here to book a Skin Wellness session with me and receive a personalized skin reading!

    Ingredients:
    In parts, which means it can be teaspoons, tablespoons, cups, grams…

    • 1 part Moringa Powder
    • 1 part Licorice Root Powder
    • 1 part Kaolin Clay

    Directions:

    • Blend all of the powders together
    • Store in a container, for 3-6 months. No need to refridgerate
    •  To use: scoop out 1 tablespoon. In the palm of your hand or in a bowl, compbine with dropletes of water to form a creamy consisency. 
    • Apply onto your skin. Leave it on until the clay just begins to dry, about 5 mintues. If you want to leave it on longer 15-20 minutes as a mask – keep misting your skin with water or rose water to keep the mask damp. 
    • Wet your fingers and in a circular motion, begin to massage, gently exfoliating your skin 
    • Rinse off with water and follow immediately with drops of plant oil to seal it all in. 
    • Feel your skin – I bet it feels amazing!! 

  • Your Winter Apothecary

    Your Winter Apothecary

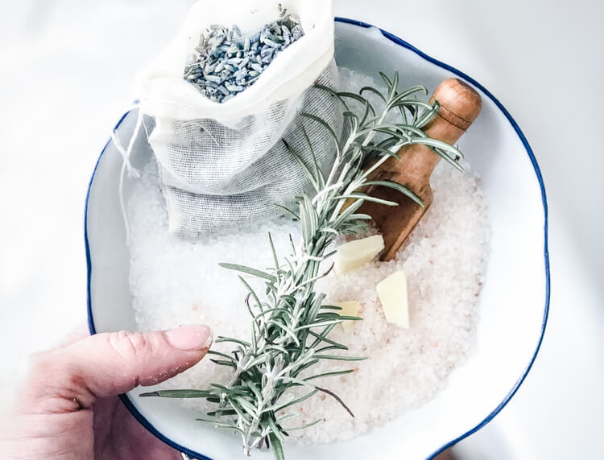
    When you feel the change of season happening outside – it’s a reminder to bring change inside of your home too. We tend to have our daily routines and our habits – but what worked for us in the Summer and Fall may not be what keeps us feeling our best in the Winter. So it’s time to think about what we need to stay well in this new season. Look through your pantry, make a grocery list and prepare your home with your own Winter Apothecary.
    I’m listing out the natural elements that you’ll want to have on hand to support your body through the colder days. Use them daily in your routine – so that even under the harshest weather – you’ll stay feeling soft, dewy and bright!

    Hydration: Honey

    As the weather becomes colder, our showers become hotter! It feels good to take a hot steamy shower on a cold day – but for the skin, hot water is incredibly dehydrating.
    To protect your skin – apply a thick coat of honey on your face before entering the shower. Leave it on as you clean your body and wash your hair – only at the end wash off the honey. Because honey is a humectant, it has the ability to drive all the moisture from the steamy air deep into your skin, keeping you dewy and hydrated.

    Moisture: Avocado Oil

    Before you get into your shower, massage your entire body with warm avocado oil. This self-massage practice will help to stimulate the lymphatic system and circulatory system – an also to nourish your nervous system helping you to destress. The oil soaks into skin and keeps you feeling soft and moisturized. When you step into the shower, do not wash off the oil with soap. Use a washcloth to clean your skin and remove excess oils and use soap strategically just on the areas you feel you need it most.

    Protection: Shea Butter

    For protection from the elements – use an occlusive over your skin – like shea butter. This will form a barrier of protection from the harsh cold weather, from the wind and from being in the drying air when we use room heaters.
    I suggest that you whip the shea butter with a hand-held mixer to make it lighter, airier and creamier to apply onto your skin.
    Use daily all over your body, and the areas where you tend to get drier skin. Massage shea butter on your hands to protect them, especially after you wash them. It’s appropriate to use on the face as well, but you don’t need to use a lot! Shea butter is non-clogging, and it stimulates micro-circulation which is so important in the cold weather.

    Immunity: Elderberry

    The most delicious way to stay healthy this season is with an Elderberry Syrup. Elderberries have antiviral and antibacterial properties that keep germs and bugs away and support a healthy immune system to keep you feeling resilient. Find my recipe for a Chocolate Vanilla Elderberry Syrup that tastes like a dessert! Drink a tablespoon daily throughout the season.

    Circulation: Warming Spices

    Using herbs that promote circulation will give your body warmth and circulate nourishment and energy into every cell in your body. In the winter, we can begin to feel a little sluggish, and interestingly if we look at the spices so common during the wintertime – they are all excellent at helping to warm and stimulate the body!
    If you make your own infused oils – I suggest that you make a Ginger + Cardamom oil infusion. Follow this guide to dry fresh ginger from the supermarket. Use this to massage your body daily, it will make you feel warm and cozy and keep your body flowing.
    Make yourself a Winter Salt Bath blend to soak in and stimulate your circulation. Add cinnamon powder, ginger powder, and vanilla extract to magnesium salt flakes. I love adding coconut milk powder to the blend as well, it makes the water feel extra silky and delicious! If you do not have a bath, make a body scrub to use in the shower for the same effect. Follow this base recipe and add in the spices.

    Sunshine: Dehydrated Citrus

    Simply smelling a citrus fruit brings uplifts the mood and makes you feel happy! Thinly slice and dehydrate a few lemons and then store them in an airtight container to use throughout the winter. Add dehydrated lemon to your tea blends, bath salts and infuse them into your avocado oil to rub all over your skin. You can dehydrate lemon slices in the oven, at the lowest setting or invest in a simple dehydrator. Use this guide to dehydrate your citrus. Dehydrating is such a wonderful way to preserve food so that you can enjoy it any time of the year!

  • Get to know: Elderberry + Chocolate Vanilla Elderberry Syrup

    Get to know: Elderberry + Chocolate Vanilla Elderberry Syrup

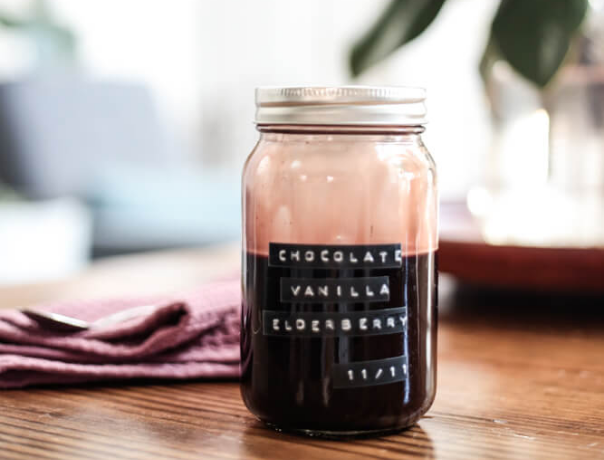
    When the world starts singing “it’s sweater weather” – that means it’s time to start making elderberry syrup! This yummy tonic has long been a popular flu remedy, taken daily through the cold and flu season.
    Every herbalist will have their own way of making elderberry syrup, today I have a recipe for you that is both potent and mouth-watering delicious!
    If you haven’t tried making your own elderberry syrup yet – it’s surprisingly simple to make, and a great way to work with this herb. So let’s dig in, learn a little more about Elder and how to make your own herbal syrup.

    Getting to know Elder

    The Elder is associated with the essence of a powerful female. Planted in your garden the Edler is thought to be the wise Crone that looks over all the others. In the book, The Book Of Herbal Wisdom, it speaks about the regard that people had for the Elder “It was considered a potentially fatal mistake to pick the plant without making an offering.”
    My herbal school gave me a young elder tree and instructed me to “let the tree pick where it wants to be in the garden.” Although this sounded… odd… I did just that. I walked around my garden, holding the potted tree asking it “Here? How about here?” It’s such a humbling feeling letting yourself be guided by nature, not assuming to know it all – but to really let yourself listen and learn from nature.
    Six months later, the Elder is growing very happily in the spot she picked – overlooking the rest of the garden. It’s funny too because now I look at this plant differently – I’ll glance over at it for guidance, like – Hi Elder, what do you think – should I plant the parsley here?

    Elder Materia Medica

    Elder has been used traditionally as food, and to support health. You’d most likely find Elderberry tincture or syrup in most herbalist homes and medicine cabinets, as the go-to remedy for colds and flu.
    Elder is antiviral. Taken at the start of “cold and flu” season or at the first sign of a cold, it helps by interfering with virus replication and strengthens cell walls preventing penetration.
    It has anti-inflammatory and analgesic actions, helping to soothe the swelling of mucous membranes, and the pain associated with colds and coughing.
    To make Elderberry syrup, we use just the berries – but the whole plant is considered a “medicine chest”
    Elder flowers are anti-inflammatory and help to move energy in a stagnant body, it supports detoxification increasing circulation and sweating, moving out toxins. It’s used dried, internally and topically. If you have access to fresh elderberry flowers, make an elderberry hydrosol to spray over congested, dull and stagnant skin. Or you can easily purchase dried elderberry flowers, to make mask formulation or bath products.
    Elder leaves are made into poultices and infused into oil for topical use. It has vulnerary and astringent actions and often used to help support the healing of bruises and sores.
    Elder berries are used cooked. You can make elderberry syrup from fresh or dried berries, although it’s easier for most to get dried berries online. Here are a couple of resources:
    Amazon
    Mountain Rose Herbs
    You can also use elderberry topically for skin health: to extract Vitamin C benefits (antioxidant protection, collagen boosting, skin brightening) infuse elderberry into honey for facial applications. Or, use powdered elderberry in a mask formulation and activate the constituents by steeping the powdered mask in hot water before application. To extract out Vitamin A benefits (natural retinol effect) infuse elderberry into oil and use on the skin.

    Elderberry Syrup Dosage

    To keep the sniffles away – take 1 teaspoon a day.
    But that said – you don’t need to treat it like medicine. Elderberry syrup is herbal food, a delicious tonic that you consume as part of your diet to support your body through cold and flu season. Elderberries are nutritious – rich in vitamins A and C, antioxidants and iron.
    You can take it by the teaspoon, drizzle it over pancakes, add it to your oatmeal porridge. You can use it as a cocktail mixer, or add to sparkling water to make fizzy drinks.

    Variations

    Elderberry syrup tastes like tart red berries. It’s not sweet on its own, so you want to add sugar, honey or maple syrup to sweeten it (and also preserve it!)
    You can make your elderberry plain and simple – just elderberry and sweetener. It’s delicious! But, you can also make variations.
    Here are a few ingredients that you can add to create your own syrup blend:

    • Cacao powder
    • Rose
    • Hibiscus
    • Chai Tea
    • Cinnamon
    • Ginger
    • Nutmeg
    • Cardamon
    • Turmeric
    • Vanilla
    • Cloves
    • Echinacea
    • Schisandra Berries

    If you come up with a yummy blend – please share – I’d love to know!

    Shelf Life

    The amount of sweetener added to this recipe – is enough to preserve the product for 1 month in the refrigerator. When you run out, make it again! It’s so nice to have it on hand at all times, if a family or friend comes down with a cold, offer them some elderberry syrup.
    You can also make a shelf-stable version that doesn’t need refrigeration by doubling the sweetener (too sweet for me!) Or, you can also add Brandy – but if you’re going that route, why not explore making yourself an Elderberry Cordial to enjoy after dinner.

    Recipe

    There are many recipes and variations. I thought I’d show you one that my herbal teacher, Maggie taught us. It’s a Chocolate Elderberry Syrup, that taste like dessert on a spoon!

    I did add my own special touch to the recipe. When Native Vanilla sent me a sample of their fair trade, ethically sourced vanilla pods – I had to add it into my elderberry syrup. The quality is beyond what you’ll find on supermarket shelves. The pods are kept moist in the vacuum-sealed packaging, and it hits you with this intense aroma! Adding it to the syrup gives it the depth, warmth, and coziness that vanilla offers.
    Here is where you can purchase the vanilla pods: https://nativevanilla.com/

    Chocolate Elderberry Syrup Recipe

    Ingredients:

    • 1 cup dried elderberries
    • 2 cups of water
    • 2 tsp cacao powder
    • 1 cinnamon stick
    • 1 vanilla pod
    • sweetener of choice: honey, maple syrup or sugar

    Method

    • In a small pot, add dried elderberries and water.
    • Scrape one vanilla pod into the pot, and then add in the whole pod.
    • Add in the cacao powder and cinnamon. Stir to combine.
    • Turn on the stovetop and let the mixture come to a simmer.
    • Simmer for 30 minutes, turn off the heat and let it sit for one hour.
    • Strain out the mixture into a measuring bowl so that you can measure how much liquid you have. With this recipe, it should be around 1 cup of liquid.
    • Add half that amount of honey to the liquid.
      *for example, If you have 1 cup of liquid, add 1/2 cup of honey
    • Mix well to dissolve the honey.
    • Pour into a bottle for storage, label, and date it.
    • Store in the refrigerator for 1 month
    • Use daily
  • Herb of the Month: SAGE

    Herb of the Month: SAGE

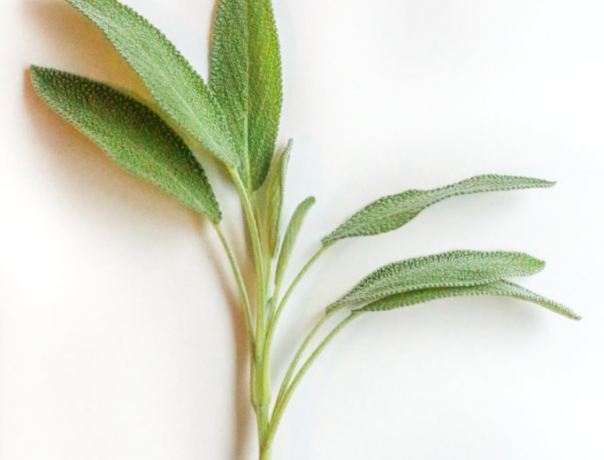
    Salvia officinalis
    The name Salvia comes from the Latin word salvare, which means “to heal” For such a common pantry herb – Sage truly has a RICH history of use of healing, both medicinally and spiritually. 
    The benefits and uses of sage are widespread. In the battlefields, sage was used by military doctors, notably Dioscorides, who found sage to be especially helpful in stopping bleeding wounds. In monasteries, sage was planted by monks and used in therapies for themselves and for the community. And in ancient kitchens, sage was used to preserve meat.
    Sage is burned ceremoniously to dispel negativity, to purify a person or place. And recent Studies validate these ancient purification practices, showing that medicinal smoke reduces airborne bacteria by 94% for 24 hours. (1)

    ACTIONS:

    • Astringent
    • Antiseptic 
    • Aromatic
    • Reduces Sweating

    Topically speaking – Sage’s combination of astringent and antiseptic actions makes it ideal for the skin, especially moist skin conditions where you see an excess of secretions.
    It tightens tissue which helps to constrict excess sweat and oils. It reduces inflammation and protects against infection, which is helpful with cuts, burns, sore throats and other conditions where tissue is irritated and healing.
    Sage is slightly warming and has anti-spasmodic actions, which help to ease tense or aching muscles. You might add sage to a muscle recovery balm, or bathe in sage to relieve aches and pains.  
    Sage belongs to the Lamiaceae family,  like Rosemary, and this family is known for its rosmarinic acid which is a stimulant that aids in hair growth. Also like Rosemary, Sage is known to help improve memory.
    The aroma of sage is stimulating and calming – the perfect combination when you need to feel alert yet grounded and steady. Sage clears away the fog, it brings clarity to the mind. The leaves are so oily and fragrant –  you simply need to rub them between your fingers and inhale the essential oils.

    TOPICAL PREPARATIONS & USES:

    • Gargle sage tea to soothe a sore throat, hoarseness or to cleanse the mouth. 
    • Fresh sage rubbed on an insect bite is used to help relieve the sting
    • A strong sage infusion (in water) can be used as a wound wash
    • A sage hydrosol is useful to control excess oils
    • Sage infused witch hazel can be a good remedy for deodorizing underarms and feet. You can also bathe in sage or make a foot bath
    • Sage hydrosol would be good for oily skin conditions, the astringent action is also helping in toning skin.
    • Sage steaming can help purify and tone the skin – you can also use it in vaginal steaming.
    • Sage infused vinegar is a good remedy for cleansing the scalp and stimulating hair growth. You might add rosemary to boost that benefit.
    • Sage infused oil is helpful in warming tired muscles, while at the same time soothing and calming skin irritations.
    • Dried sage can be added to a bath blend, to cleanse and soothe the body and aromatically to bring calm and clarity to the mind.
    • Dried powdered sage can be added to facial mask formulations for its astringent actions.

    RECIPES TO TRY:

    Deodorant Spray
    Herbal Steam for Colds
    Sage Syrup
    Sugared Sage Leaves for Baths

    Grow Sage: Click here for seeds
    Stock dry Sage in your pantry: Click here for dried herb

  • Ingredient Spotlight: Clay, what it is and how to use it

    Ingredient Spotlight: Clay, what it is and how to use it

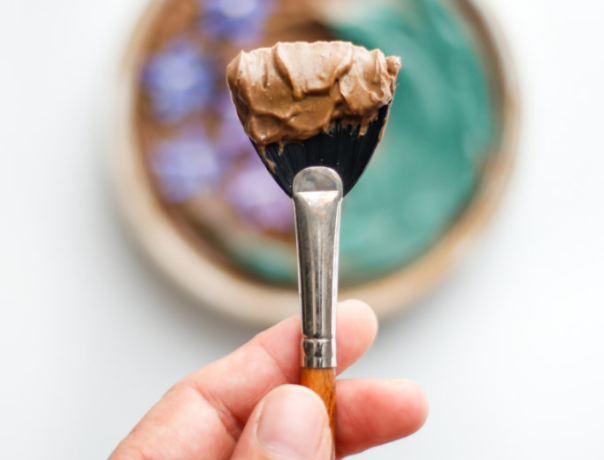
    Nothing gives the skin a natural fresh startlike clay does. It is such a special ingredient to get to know and understand how to work with. Clay is stimulating, it’s active and its quick acting. You often see a difference in the tone and the texture of your skin from the first use.
    And when used regularly, it helps to clear blackheads, acne and restore balance to the skin. So, let’s dig deeper into clay – and hopefully, you’ll be inspired to make it part of your regular skin routine.

    Actions of Clay on the skin

    You might hear that clay absorbs impurities – but it actually adsorbs, which means things attach to clay particles, like a magnet. It’s a deep cleanser that clears away impurities which otherwise overwhelm the skin. It soothes irritations and it soothes inflammation. When you apply clay all over your face, it gently warms the skin and boosts circulation – this is so good for healthy skin.
    I know that when I use a clay mask, my skin feels totally refreshed. It feels more tone, it looks more vibrant – and when I use clay masks regularly, I see fewer blackheads and congestion in my skin. My skin is in balance.
    I do make my own clay mask treatments at home – and I mix in other ingredients depending on what my skin needs – I go into that more below.

    Topical Uses of clay

    The use of clay medicinally has been traced back to ancient Mesopotamia. Throughout history, we have been covering our skin in healing mud to cleanse, soothe and promote healing.

    You can use clay therapeutically for first-aid and beauty simply by preparing a paste of clay and water – and applying it to affected areas:

    • Poison ivy rashes, or dermatitis on the skin from allergic contact (ref)
    • Diaper dermatitis (ref)
    • Itchy stings and bites
    • Blackheads and clogged pores
    • Ance (ref)
    • Oily, out of blance skin
    • Dull complexion

    Types of Clay

    There are many different types of clay, and each one is a little different.
    Here’s are some descriptions to see which one might be right for you:

    • Kaolin Clay: Very gentle in its actions – if you want to use clay more regularly 2-3 times per week, it’s a good option.
    • Rhassoul Clay: This red earth clay was used like soap and shampoo, it has a cleansing effect. But it also improves the texture and clarity of skin. It has very potent drawing effect, if you want a slightly more gentle remedy, you can mix in kaolin clay to create a “pink clay”
    • Fuller’s Earth: Known for its use as a skin-lightener, its a good choice when you want to brighten and even out your complexion, but also it’s very good for oily skin, mopping up excess oils.
    • French Green Clay: Not always from France, but always green. It gets its color from what its made of: decomposed plants and iron oxide. Green clay is highly adsorbent and stimulating to the skin, it takes up impurities and excess oils and has a toning effect. Great for oily skin but also maturing skin.
    • Bentonite Clay: Acts very differently from other clays. It’s very thirsty, needs more water and swells up like a sponge. I love the way it feels on the skin, almost like a rubber mask, thick and cocooning. It’s very good at adsorbing impurities from the skin, and balancing oil in the pores.

    You can find and purchase clay online, and from health food stores

    How to use Clay for different conditions:

    It makes sense to stock your pantry with a pure, dry clay powder – and then prepare your mask treament fresh as needed. It’s not only more economical than buying a pre-made clay mask – but with clay powder in your pantry – you can always customize a treatment to fit your specific needs:

    • Dermatitis, inflammation: Clay + anti-inflammatory powdered herbs
    • Itchy skin: Clay + cooling, antipruritic powdered herbs
    • Dry skin: Clay + demulcent powered herbs, emollients or humectants
    • Oily skin: Clay + astringent powdered herbs
    • Acneic skin: Clay + anti-bacterial, anti-inflammatory powdered herbs, but also clay combined with jojoba oil has been shown to reduce pustules
    • Healthy skin: Clay + tonic, nourishing and alterative powdered herbs
    • Dull or Congested skin: Clay + buttermilk powder

    Pro Clay Tips

    Mixing: When making a clay mask, add the clay to the water – not the other way around, for better consistency. The right way makes a mud, the other way makes a sludge.
    Consistency: For one facial application, add 1 tbsp of water to a bowl, and then begin to mix in the clay until it reaches the right consistency. You can then add in oil, or honey if you choose.
    Time-saving: You can pre-make a batch of blended dry ingredients (clay + powdered herb or powdered milk) and store it in a jar, good for 3 months. Simply spoon out your clay blend to create a mask as you need. Application: Never let a clay mask dry and crack on your skin, this will dehydrate your skin. While wearing your mask, keep the clay moistened with a facial mist, or wash it off before it dries.

  • Pantry Ingredient: Freeze Dried Fruit

    Pantry Ingredient: Freeze Dried Fruit

    I’m excited to teach you today how to get the benefits of fresh food skincare, with the convenience of freeze-dried ingredients.
    When I first started teaching skincare, I taught workshops on how to make fresh food masks that rivaled anything you could buy. I’d show up to these classes with a basket full of fresh ingredients and start chopping and blending and mixing…
    And the biggest question I got was: Do I have to make this fresh every time? I get it. Everyone is busy.
    But I knew one thing for sure: nothing is better for your skin than whole food skincare and nothing is cheaper for your wallet or better for the planet than learning how to do it yourself.
    So I kept working on solving the problem: how do we make fresh skincare that rivals store bought? It needs to be simple to make, it needs to have a long shelf life, be enjoyable to use and truly work.

    Fresh strawberry body scrub – amazing, but also perishable

    The “problem” with fresh skincare

    Fresh fruits are full of water – and water is the enemy of homemade skincare. Water is a breeding ground for bacteria and mold to grow. Which is why, the moment you prepare a fresh face mask – the clock starts ticking before it goes bad.
    For example, my strawberry body scrub makes your skin feel amazing – and is worth making – but because it has fruit in it I recommend making a fresh small batch every time you want to use it.
    And this is a little high-maintenance for most folks.

    Then, I discovered freeze-dried strawberries at my supermarket. It smells like a strawberry, it tastes like a strawberry and in every sense of the word, it is a strawberry.
    But because it’s been freeze-dried, there is no water – which means the effort you put into making a recipe – will last for weeks, not days!

    What does freeze-dried mean?

    Freeze drying is a food preservation technique where food is rapidly frozen and then the ice particles are vacuumed out. It leaves food in a state of “suspended animation” where the composition, the enzymes, vitamins, and nutrients are completely intact – but the water component is completely removed.
    If you’ve ever tried “astronaut ice-cream” as a kid – then you’ve experienced the magic of freeze dried food! What feels like a crisp, powdery block in your hands – on contact with your tongue – instantly transforms back to its original creamy state. Entire cooked meals can be freeze-dried and stored away for years and years (survivalists are doing this and with climate change – they might be onto something!) and when you’re ready to eat it, a little water brings it right back to life.


    Instant-mashed potatoes and gravy asidefor our skin, we want to focus on whole food ingredients that have not been salted, sugared or flavored.
    Whole strawberry. Blueberry. even Kale… the food that nature makes.
    These fruits and vegetables are picked fresh at their peak and then instantly freeze-dried. The moment you add a little water – you bring this natural element back to life. And what was dormant, is now again active, fresh and awakened enzymes and nutrients food for your skin. How cool is that!?
    Now, freeze-dried fruit is not just for “fun” homemade skincare. Many natural skincare brands are using freeze-dried ingredients in their products.
    So you’re rolling with the big guys!
    S.W. Basics do it.
    Youth to the People do it.
    Laurel Skin do it.
    And you can too.

    What are the benefits of freeze-dried ingredients?

    • Convenience: Noting beats a fresh food face mask, except for a fresh food face mask that you can make once and lasts without going off!
    • Color and scent: Freeze dried foods add natural color and scent to your products!
    • Transportation: With the water weight removed, you can easily carry a farmer’s market haul of fruit in your travel bag for the freshest skincare anytime you need it.
    • Results: You will see a dramatic difference in your skin when you when you switch out preservative-filled, fragrance-loaded skincare – with simple wholefood skincare. The main comments that I hear from people are more balanced, clear and bright skin.

    How do I choose the right ingredient for my skin?

    All skin types benefit from the nutrients present in all raw fruits and vegetables. Whether you use strawberries or bananas – you will see your skin improve in health and function with consistency.
    That said, here are my suggestions for specific concerns:
    Dry skin: freeze-dried banana for fat
    Oily, congested skin: freeze-dried pineapple for enzymes
    Sensitive skin: freeze-dried aloe for soothing
    Maturing skin: freeze-dried berries for antioxidants
    Dehydrated skin: freeze-dried aloe for hydration and increased water retention + freeze-dried banana for fat.

    How do I use freeze-dried ingredients

    Okay, so you decided to trust me – and bought a packet of freeze-dried fruit. Now what?
    Step 1: Grind it to a powder in a blender, breaking down whole pieces into a usable skincare ingredient.
    Step 2: Add the powder to a recipe.
    1. Add a boost of fruit to the Oat Mylk Powder Cleanser.
    2. Add shelf-stable strawberry powder to the Strawberry Body Scrub.
    3. Add an enzymamic boost to this Hydration Mask.
    Here are other recipes to experiment with:
    1. Lime and Strawberry Bath Melt
    2. Fruit Bath Bomb

    Where do I buy freeze-dried fruit?

    You can find packets like this in health food stores: Whole Foods, Sprouts, Trader Joe’s – and also I see them stocked in just my local supermarket too.
    Online: Click here to shop for freeze-dried ingredients.


    I hope this sparks curiosity and inspiration to make your own fresh skincare at home.
    If you feel that you need a little more support – I am available for one-on-one consultation to offer you a customized skincare protocol, where’ll I’ll talk with you to determine the best ingredients and recipe blends for your individual constitution, emotional needs and lifestyle, with step-by-step recipe guidance. Email me for details: [email protected]
    Militza xx